Mopinion has joined forces with online automation tool Zapier to deliver quick and easy integrations between your Mopinion feedback data and CRM software Salesforce (among other app integrations). Thanks to Mopinion webhooks, integrating your feedback with Salesforce is a breeze. Ready to start relaying your feedback data to Salesforce in real-time? We’re here to help you get set up.
Mopinion has created a step by step ‘How to’ for integrating your user feedback with Salesforce using Zapier. But first things first…what is a Mopinion webhook? What is Zapier? And why should you integrate your user feedback with Salesforce in the first place? Keep reading and find out.
What is a Mopinion webhook?
The Mopinion webhook system enables users to relay data to other applications as the data comes in, rather than polling for the latest updates. In other words, users can easily integrate Mopinion feedback data with other apps. All they have to do is send the data to application endpoints (or the URL where feedback data will be sent to).
For more information regarding Mopinion webhooks, check out this article.
What is Zapier
Zapier is your best friend when it comes to data integration. Zapier is an online automation tool that allows end users to integration their web apps using what they call Zaps. Zaps are blueprints for a task that you want to complete over and over without having to open apps manually.

Zapier offers a solution for incoming webhooks as well which allows Mopinion webhooks to be posted to the Zapier endpoint. And voila! Your user feedback data can be connected to thousands of different apps, including Salesforce.
Why integrate your feedback with Salesforce?
For starters, Salesforce was built for organisation and productivity, so that already makes it a great place to house feedback. So when you combine this software with your feedback, you are essentially adding depth to your customer data. How? The subjective information you collect from your feedback such as customer satisfaction, NPS, customer preferences and even key demographic information will provide you with a 360-degree customer view and thus, the opportunity to better serve your customers.

With Mopinion feedback data, for example, you can apply behavioural triggers (such as exit intent in a funnel) and capture fresh leads that are posted directly to your leads section in Salesforce.
How to integrate Mopinion with Salesforce
To integrate the Mopinion software with Salesforce, you’ll need to set up your Zapier account first.
1. Log into Zapier and create a Zap
- Create an account at Zapier.com (if you don’t already have one)
- Click the “Make a Zap” button

2. Push Mopinion feedback data to Zapier with Mopinion webhooks
- After clicking on “Make a Zap”, you will be redirected to the trigger screen, where you can add your first trigger. The trigger is used to connect the Mopinion webhook to Zapier and push your feedback data to the Zapier system.
- Select Built-in Apps > Webhooks.
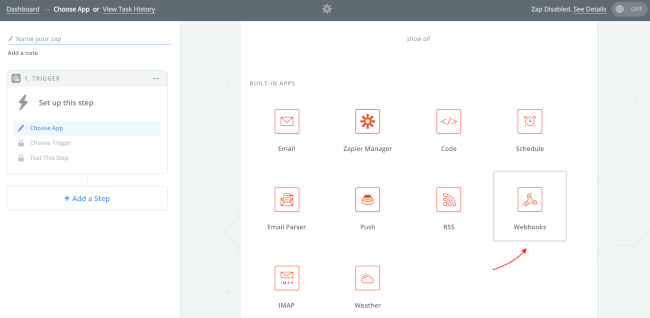
- Select the Catch Hook option:
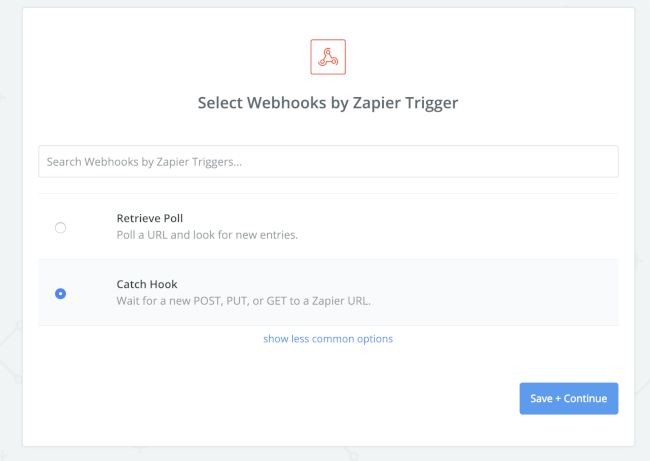
- Hit Save + Continue
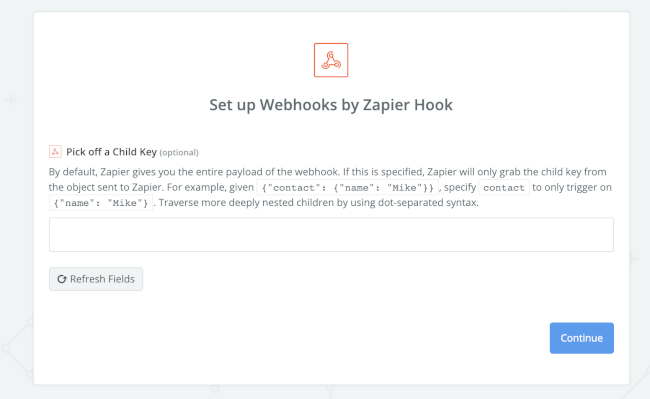
- On the next screen, leave the field empty and click Continue:
- Copy the Zapier URL (endpoint):
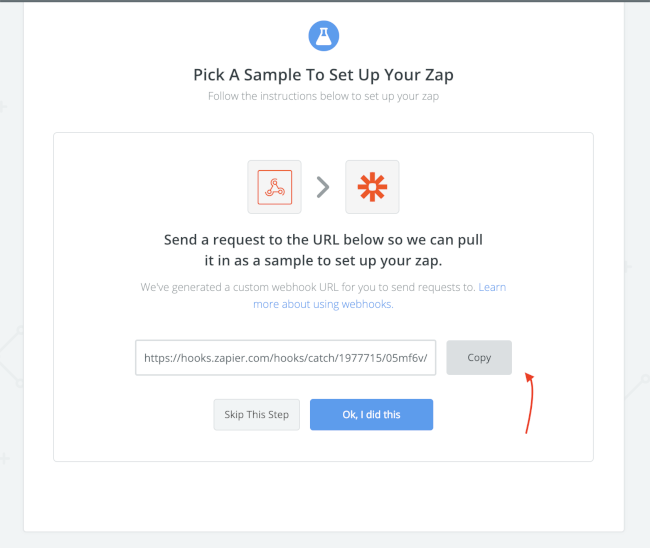
- You will need this URL for the next step, which is inputting it in the Mopinion Webhook system
- Now login to your Mopinion account
- Go to Settings and then Webhooks
- Select a Source, e.g. one of your feedback forms
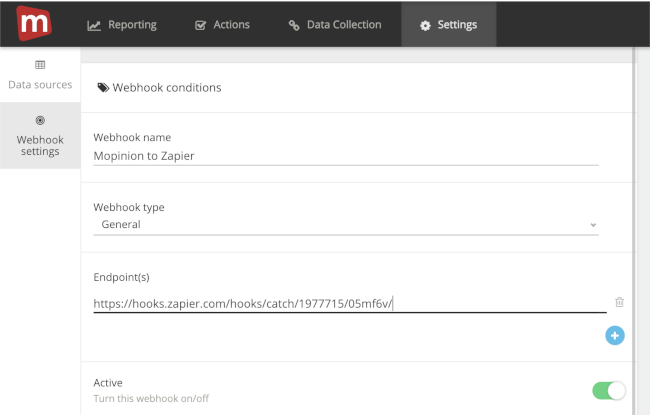
- Give the Webhook a name, e.g. “Mopinion to Zapier”
- For the Webhook Type, choose “General” (this is a post of a json payload to the Zapier endpoint)
- Add the Zapier URL (endpoint) that you copied earlier.
Your setup should look as follows:
How to add conditions to Mopinion webhooks
It is possible to add some conditions, which will determine when the webhook is pushed to Zapier. Let’s take a look at some examples below.
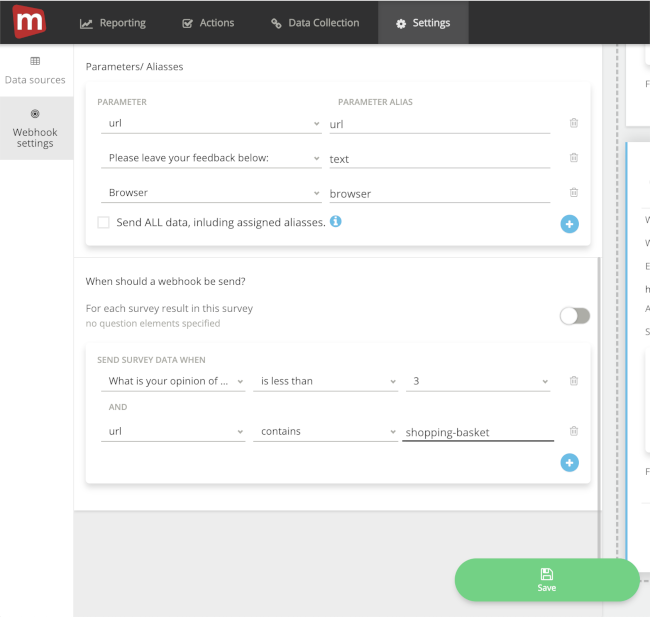
The image above is an example of some conditions you can choose from, including:
- Sending only specified fields to Zapier, such as URL, text / open comments, and browser details.
- A condition to ONLY send feedback when the feedback score (e.g. Net Promoter Score or Customer Satisfaction) is below 3 and when the URL where the feedback is submitted contains ‘shopping-basket’.
But these are just a few, there are endless combinations of conditions you can set up with your webhook. To learn more about setting up webhooks, click here.
Note: it is not mandatory to select conditions. You can also send ALL data to Salesforce without any predefined conditions attached. Besides, for testing purposes, that’s usually the easiest way to monitor if the data is flowing in Zapier.
Last step? Don’t forget to Save the Webhook and see to it that it’s set to ‘Active’ (see Active toggle).
How to test your feedback data in Zapier
Your webhooks are a go! Now you are ready to do some testing:
- Start by opening up the feedback form you’ve used to set up the webhook.
- Submit your feedback (if you used conditions in the webhook like in the example, make sure those conditions are met).
- Now log back in to your Zapier account.
Note: there is a slight delay in our webhook system, so it could take a couple of minutes before your test results have reached Zapier.
Lastly, click the test link and see if feedback is coming in:
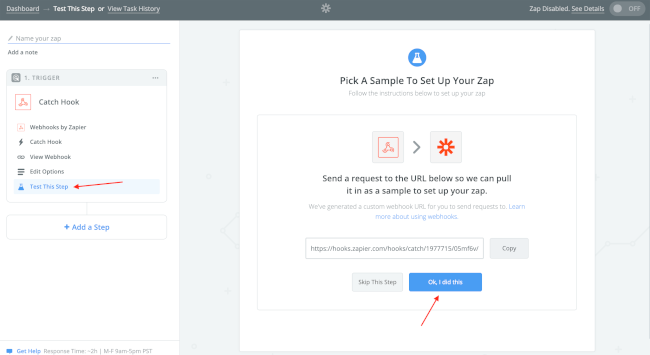
3. Send feedback data from Zapier to Salesforce
It’s finally time to connect Mopinion to Salesforce (via Zapier). To do this you’ll need to add an action to the trigger. Actions allow you to send the Mopinion feedback data to Salesforce.
Once the Zapier trigger is setup properly and the Mopinion Webhook has been activated, your feedback data should reach the Zapier application. From there, you can start pushing the feedback data to Salesforce.
To do this, follow the steps below:
- Click the “+Add Step” button to add the action
- Choose the option: Action/Search
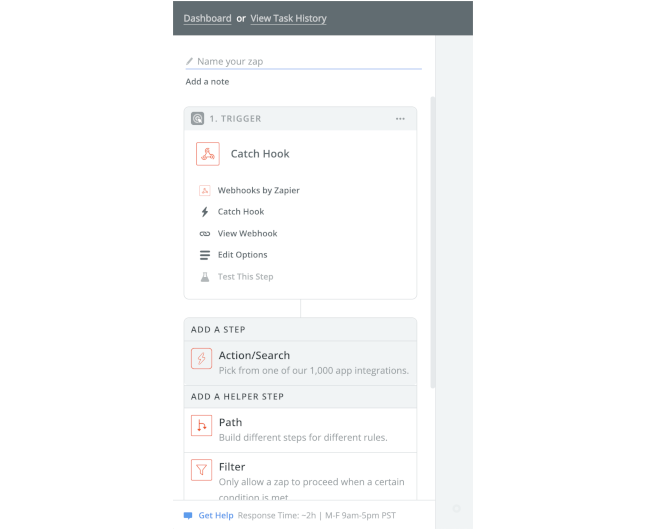
- You’ll see a couple of Built-in apps from Zapier such as email, RSS, SMS, and translations. However, you’ll also find pre-built integrations from other software providers, such as Google docs, Salesforce, Mailchimp, etc.
- Type in Salesforce and select the app from the pulldown.
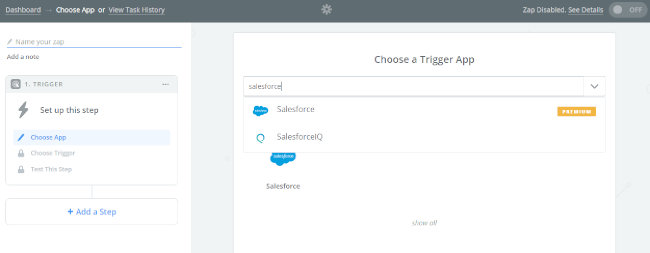
- Select your trigger(s). For example, ‘New Lead’ which may be the contact details filled in by visitors who are not yet a customer, or ‘New Contact’, which would be applied for existing customers. For this example, we will select ‘New Lead’.
- Once you’ve selected ‘New Lead’, click on Continue’.
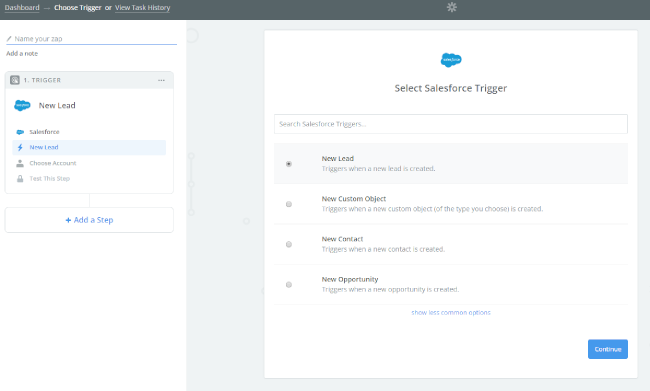
Then you will be prompted to connect your Salesforce account. When you’ve completed this step, your screen will look like this:
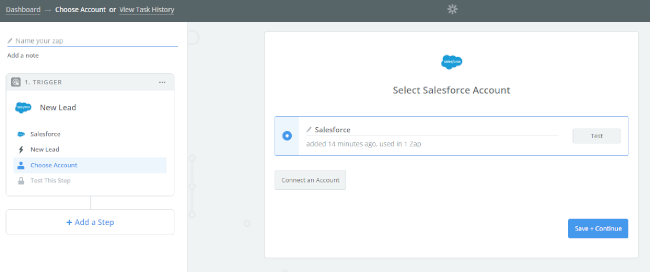
- Hit ‘Save + Continue’
- Now all that’s left is to test this step. You can test using a sample from your Salesforce account.
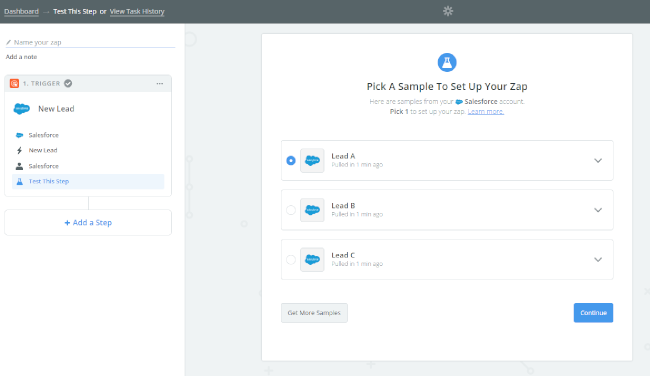
Congratulations! You have successfully integrated Mopinion with Salesforce.
Want to filter your data?
Learn more about adding additional filters and tweaking your new integration here (see step #4).
Get connected!
No more bouncing from dashboard to dashboard. You have your feedback data at your fingertips, when and where you want it. And now, equipped with the tools and knowledge you need to integrate your feedback data with all your favorite apps, you can finally start focusing on what really matters: your customers.
Ready to see Mopinion in action?
Want to learn more about Mopinion’s all-in-1 user feedback platform? Don’t be shy and take our software for a spin! Do you prefer it a bit more personal? Just book a demo. One of our feedback pro’s will guide you through the software and answer any questions you may have.


